Knowing Light Artifacts: The Elephant in the Editing Room
You will know from past experience removing a white background from an image: the fight is real. White backdrops may be a trickster’s playground for fading halos, darkening fringes, and stark, washed-out edges. Driven for sleek outcomes, you were most likely looking for the best ai tool for background removal. Still, nasty light relics find their way in even when technology does the heavy job. Why does this occur—and how would you counter?
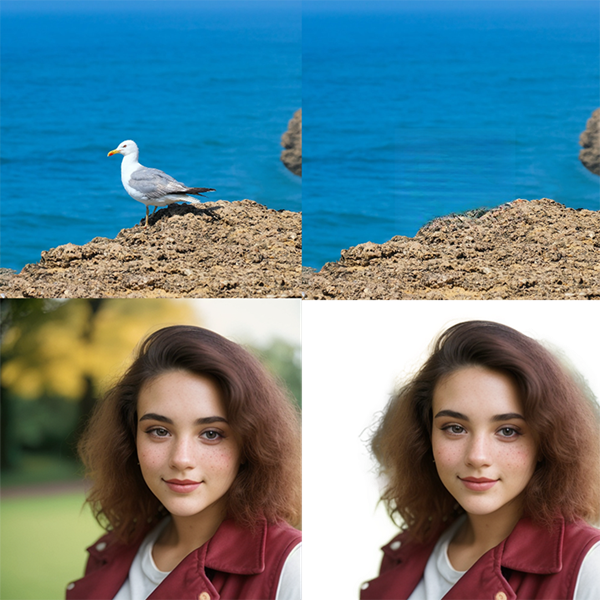
Light artifacts arise from pure white being somewhat unusual in real-life images; most “white” backgrounds have gradients, soft shadow play, or subdued color tints. Digital sensors detect everything the human eye misses: reflections off shiny surfaces, colored light pouring onto edges, or a model’s arm producing a small shadow. Remove the white, and these relics come to front. Your neat product picture suddenly has faded edges or a ghostly outline.
Typical offenders range from Halos to Shadows.
Now let us consider a situation. You have captured on a white tabletop a perfect picture of a mug. Natural light comes in through filters. You cut out the background. But right now the mug has a thin gray halo. What?
Lines of Frange and Halos
Most often found artifact following extraction is this one. Most removal software choose a “soft cutout” to minimize jagged edges when high-contrast edges cross brilliant backgrounds. Unfortunately, this softness produces a fringe either unreasonably black (shadow line) or lighter than your object (halo). The outcome is… A floating impact screaming, “edited here!”
Color Bleed
Yet another offender is color bleed. Imagine photographing a blue goods against a white sheet. The colorful object can reflect colors onto the background. Eliminate the white, and those subdued color casts continue to be weird outlines around your subject, so compromising the professional finish.
Shadows: Issues
In the real world, shadows give images anchor value and context. Auto-removal tools could carve strange forms or leave “attached” bits of backdrop that don’t fit the object, mistaking faint shadows for part of it. Sometimes sharply cut shadows give the subject the impression of floating rather than sitting on a surface.
Using Your Tools: Intelligence Above Muscle
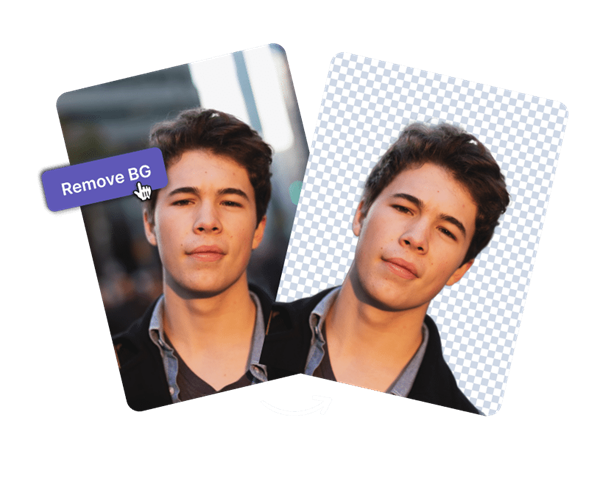
Many consumers think a more expensive tool fixes all problems magically. Reality check: while automation has great power, post-process correction is absolutely vital. Modern tools supported by machine learning, such as Remove.bg or selections driven by Adobe’s Sensei-powered tools, get it most of the times. Still understanding the subtleties, though, especially with light objects and strong contrast differentials, is artificial intelligence.
The “Select and Mask” edge enhancement in Photoshop allows you to adjust the extent of that cut-off or preservation of the transition zone. Making liberal use of the “Decontaminate Colors” checkbox will help—this option tries to repaint those deceptive color fringes to mix better with the new background. Automated services speed up productivity for bulk operations or marketplaces, but they may also need touch-ups for important hero photos.

Editing by Hand vs. Automaton: Finding Harmony
After using artificial intelligence to create a first cutout, friend the masking tools in your editing suite. Manual refining edges allows you target difficult areas, lower halos, and regulate contrast loss. Usually applied in portrait touch-ups, the “Dodge and Burn” technique finds fresh life here. Lighten or darken edges gently; gently rebuild any lost definition and eliminate ghostly remains.
One can view feathering the edge as a two-edged sword. Go too far and the subject blues. Too tight, and preliminary sketches still exist. Work zoomed in, pixel by pixel adjusting the feather radius. Some swear by the edge command “Contract/Expand”. Contract reduces the mask; chew away fringes; expand can recover clipped details.
And don’t overlook the lowly eraser tool, applied at very low opacity. Sometimes a gentle brush with light dabs removes light streaks missed by automatic equipment.
Talk: Users Share Their Compliments and Frustrations
I once came onto a forum where a designer said, “I spent more cleaning up stray pixels on a coffee pot handle than brewing the coffee itself!” Another acknowledged to using the clone stamp more than half the time only to cover poor white extractions. Everyone agrees: never rely just on one-click magic. If you change before exporting the last version, you will avoid post-publish problems.
High Contrast Edges: Maintaining the Pop
Eliminating white sometimes throws off contrast. Extracted things can seem less vivid, devoid of the force they had against a brilliant background.
Using Levels and Curves to Boost
One can find support from the “Levels,” or “Curves,” adjustment layers. Cut out the backdrop then adjust the highlights and midtones. Move the shadow sliders inward to deepen black at the edge, recovering lost punch. Be careful; pushing these too hard creates artificial-looking images or harsh lines.
Sometimes saturation requires a boost, particularly if color seems washed out following extraction. Aim for the impacted region with a local adjustment instead of a global one.
Adding subdued drop shadows
A little drop shadow under a cut-out grounds the object and gives it more lifelike appearance. Keep the shadow hardly seen by using a soft, low-opacity brush. On e-commerce sites, this is particularly successful for product photographs since it creates a sense of weight and spaciousness.
Steer Clear of Pure White Replacements
Any artifacts will be accentuated by laying your cutout on a pure white (#FFFFFF) backdrop. Rather use a near-white (like #F8F8). You would be shocked how much kinder this is to your edited edges as well as the eye.
Fact Check: Why Online Artifacts Are Different
White on screens is hardly “white.” Different monitors show it differently, and JPEG compression can introduce color noise or halos. Edit and then zoom your picture in and out. Invisible at 100% artifacts can suddenly jump out at 50% or 200%. Your editor’s “light mode” and “dark mode” backgrounds can be switched to assist find residual flaws.
According to a 2022 eBay analysis, listings with better backgrounds registered up to 5% higher sale conversions. These little defects affect buyer confidence, not just appearance. Even if they are unaware of it, a customer who zips in and finds a ragged edge unconsciously questions professionalism.
The Limitations of Artificial Intelligence: Still Need People
Although they strain the imagination, artificial intelligence background removers are not wizards. Manual corrections are absolutely essential for difficult subjects—fine hair, translucent packaging, shining surfaces. Particularly so, hair trips up algorithms: those fluffy, half-transparent threads produce sudden transitions, and auto-tools struggle to understand where subject ends, and backdrop begins.
Trusting artificial intelligence for hundreds of photos is seductive on hectic manufacturing lines. For flagship content, however, a designer’s touch counts.
