Removing a black background from an image can improve its visual appeal and seamlessly integrate it into different designs or presentations. Whether you’re a graphic designer, photographer, or hobbyist, mastering this technique adds versatility to your creative toolkit. You can achieve clean, professional-looking results with the right tools and techniques.
To get started, you need image editing software capable of handling layers and precise selections, such as Adobe Photoshop or GIMP. These programs offer powerful tools like the Magic Wand or Quick Selection tool for initial selection, followed by refinement with techniques like layer masking or the Pen tool for intricate details.
The process usually selects the black background, either automatically or manually, and then removes it while preserving the foreground subject. This can be achieved through inverse selection, feathered edges, or Blending Mode to seamlessly blend the subject into the new background.
However, achieving a flawless result can require patience and attention to detail, especially with complex or finely detailed images. Understanding concepts like contrast, edge refinement, and color correction will help you refine your selections and ensure a professional finish.
In this guide, we’ll explore step-by-step instructions and tips to effectively remove black backgrounds from images, empowering you to enhance your visuals and unleash your creativity.
The Importance of Backgrounds in Photos
Backgrounds play a crucial role in photography, shaping the narrative and enhancing the subject. A well-chosen background can elevate a photo from ordinary to extraordinary, adding depth, context, and visual interest. Whether it’s a scenic landscape, an urban environment, or a minimalist backdrop, the background sets the stage for the main subject to shine. It provides context, conveying mood, story, and atmosphere. Additionally, a cluttered or distracting background can detract from the subject, while a clean, unobtrusive background allows the viewer to focus solely on what’s important. In essence, backgrounds are the silent storytellers of photography, enriching the visual experience.
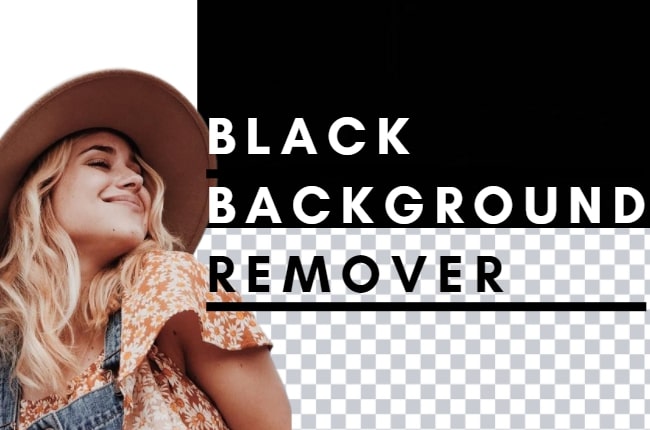
Why remove a black background from an image?
Removing a black background from photos can significantly improve their versatility and appeal. First, it eliminates distractions, allowing content to stand out. This is particularly beneficial for product photography, where a clean, white background can highlight item details. Furthermore, removing a black background opens up creative possibilities by enabling seamless integration across different designs or platforms. Whether it’s for e-commerce listings, presentations, or social media posts, a transparent background provides flexibility and professionalism. In essence, by removing a black background, photos become more adaptive, engaging, and visually appealing, enhancing their overall impact.
A step-by-step guide to removing a black background from an image
Removing a black background from an image can breathe new life into your photos, making them more versatile and visually appealing. Whether you’re editing product images for an online store or enhancing personal photos, mastering this technique can be invaluable. Here’s a step-by-step guide to help you achieve professional-looking results.
- Choose the right tool:Open your favorite image editing software. Adobe Photoshop is widely used, but other programs such as GIMP or online tools such as Pixlr can also do the job.
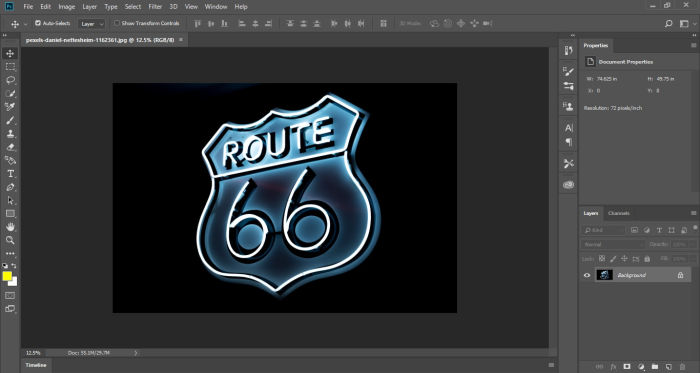
- Open the image:Load the image with a black background into your editing software.
- Select Magic Wand Tool:This tool is great for selecting areas with similar colors. Click the Magic Wand tool on your toolbar.
- Adjust Tool Settings:Set the tolerance level of the Magic Wand tool. A higher tolerance will select more shades of black, while a lower tolerance will be more selective.
- Select background:Click on the black background in your image. The Magic Wand Tool will create a selection around it.
- Refine Selection:Use the Shift key to add selections as needed. Press and hold Shift, then click additional areas of the background to include in the selection.
- Invert Selection:Once the background is selected, go to the “Selection” menu and choose “Invert” or press Ctrl+Shift+I (Cmd+Shift+I on Mac). This will invert the selection, now isolating the subject instead of the background.
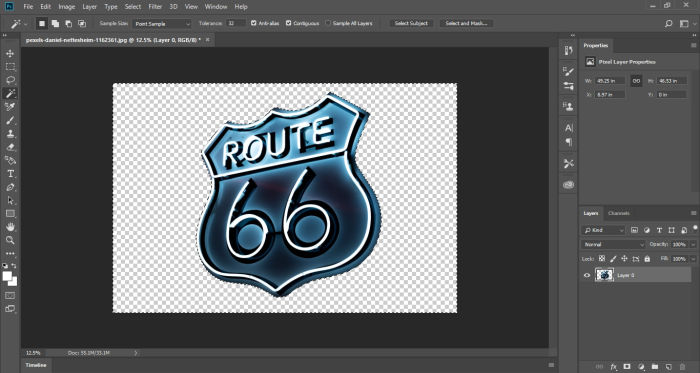
- Delete Background:Press the Delete key to remove the selected black background. You should now see a transparent background behind your subject.
- Fine-tune edges:Use a tool like the Eraser tool or the Refine Edge tool to clean up any rough edges around the subject.
- Save your image:Finally, save your edited image in a format that supports transparency, such as PNG, to save a transparent background.
With practice, you’ll become more adept at removing backgrounds from images with complex shapes or different colors. Experiment with different tools and techniques to achieve the best results for your specific image editing needs.
Conclusion
Mastering the art of removing a black background from an image opens up a world of possibilities in photo editing. With the right tools and techniques, you can transform ordinary images into visually stunning creations. By following the step-by-step guide outlined above, you’ll be able to seamlessly remove black backgrounds and create transparent backgrounds that enhance the overall aesthetics of your photos.
Remember, practice makes perfect. Don’t be discouraged if your first attempts aren’t flawless. Keep experimenting with different tools and refining your skills, and soon you’ll be producing professional-quality images with ease. Whether you’re editing product photos for e-commerce, enhancing personal photos for social media, or working on creative projects, the ability to remove black backgrounds will undoubtedly elevate your editing game. So, roll up your sleeves, dive into your favorite image editing software, and unleash your creativity!
